
Etsy Plugin Installation & Feed Creation
Etsy WooCommerce Integration using ExportFeed Plugin
This Etsy plugin installation and feed creation manual is an easy guide to list and start selling your products on Etsy. Go through these simple steps to create feeds and upload in Etsy.
1. Install & activate ExportFeed Etsy Plugin.
2. Add Etsy Account
To begin with the feed creation process, you need to set up the Etsy account first. Follow the instructions to configure the Etsy account and Etsy shop through the API details.
Note * You must have Etsy developer account and an app to gather the information needed.
Note: For Shopify & BigCommerce apps, you can simply install ExportFeed app and after installing, Add Etsy sales channel, you will be redirected to login screen on Etsy. After logging in, please click on Allow Access to authorize ExportFeed to manage your products listing.
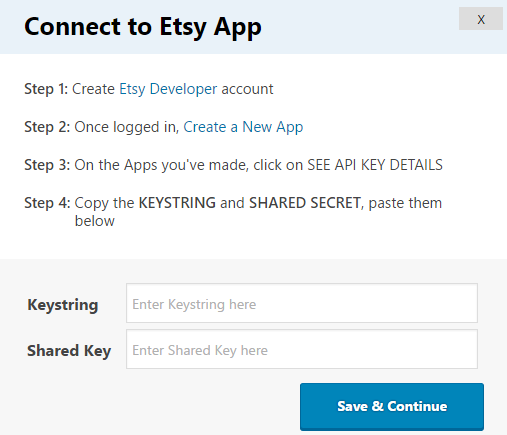
Once you insert the Keystring and Shared Key, you need to “Save & Continue” to proceed with Etsy shop installation.
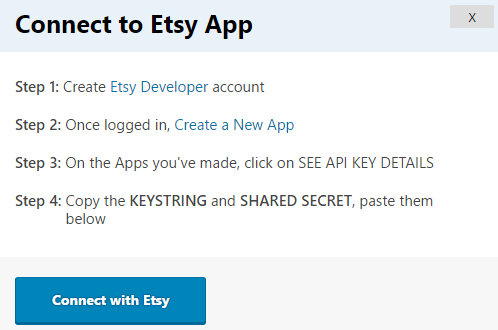
3. Connect with Etsy
Once your secret keys are saved, you’ll see this message on a dialog box. Select “Connect with Etsy” which will help you fetch login details and permit access to your Etsy shop.
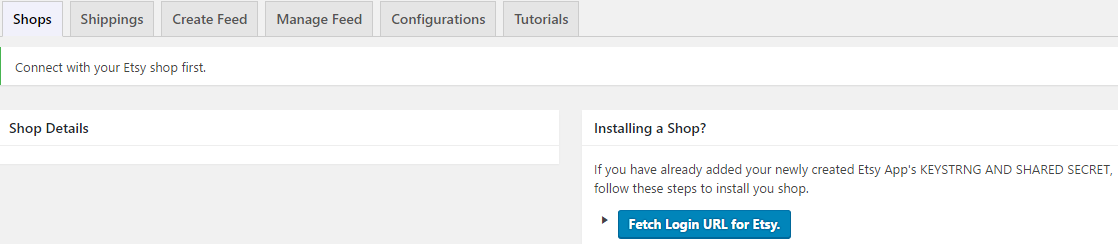
4. Configure Etsy Shop
The configuration process begins with the “Request Login URL” step which should be completed as per the given instructions.

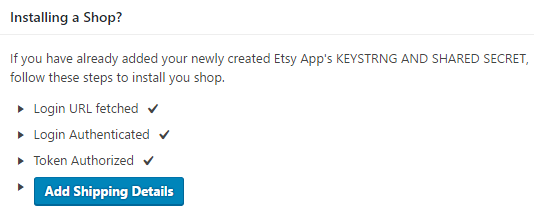
You’ll be redirected to Etsy shop as you Fetch the Login URL, click on “Allow Access” for connecting Etsy plugin with your Etsy developer account.

Once, you select “Allow Access“, complete the procedure for installing your shop. You’ll receive the information below on the successful installation of Etsy shop.
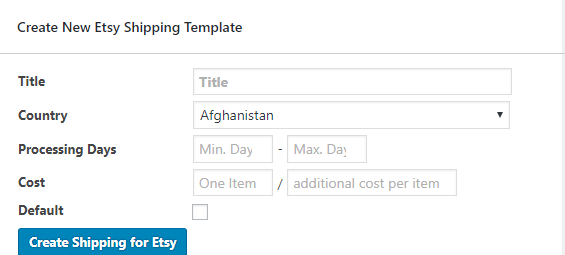
Insert the shipping details and initialize the default shipping for your shop. Now, you can create fixed shipping template from our plugin itself for etsy.
Note: If you are new to selling on Etsy, please make sure that your Shipping Configuration on Etsy Marketplace should be complete. Without that, you will not be able to upload your products. Also, as Etsy API only allows the Flat shipping for bulk product updates, please make sure to create a Flat Rate Shipping Configuration.
5. Generate first feed
You’re now all set to create your first feed. On the “Create Feeds” tab, fill in Woocommerce category, Etsy category and file name for feed and click on “Get Feed“.

6. Upload Feeds
Note: There might be error on your feed. Please check whether the required attributes are on the feed or not in order to list error free listings. Click here.
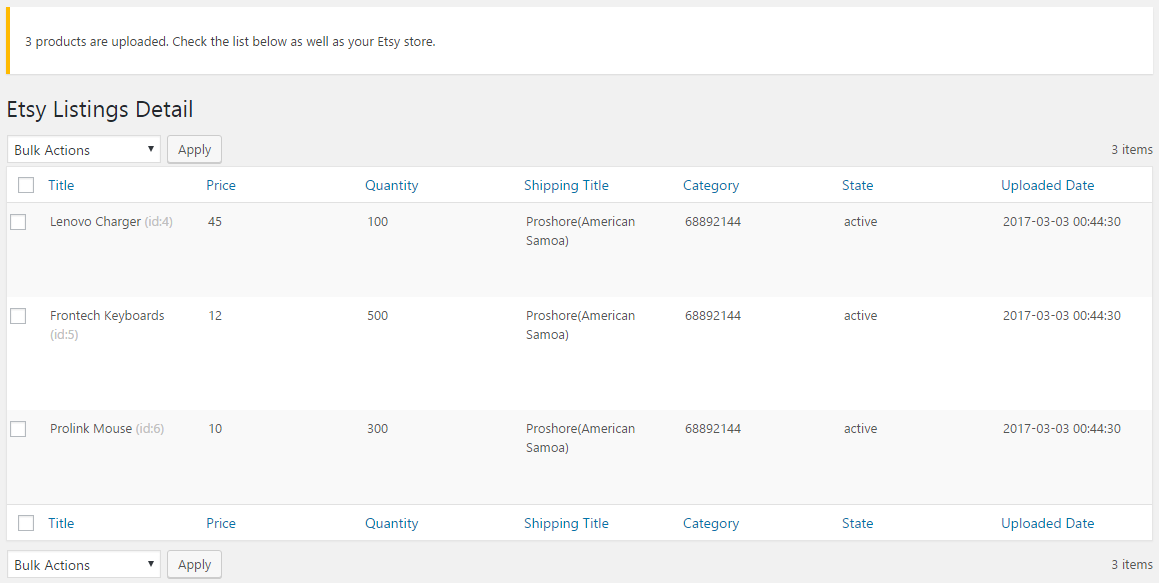
Go to “Manage Feeds” section, select the feed and click on “Upload“.

You can now see the details of the uploaded product.
Note: As of the plugin update on July 2019, your Etsy plugin also fetches orders and syncs inventories between WooCommerce and Etsy.
Here’s how you can manage the settings for Order Sync.
Etsy Order Sync Settings
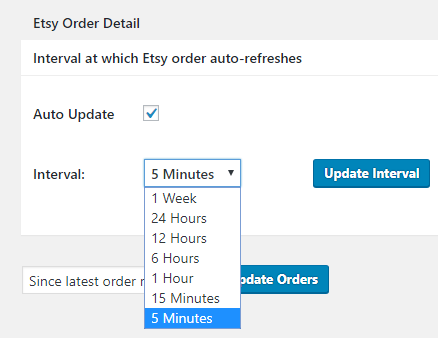
Auto Update: Enabling this will allow the plugin to get your orders from the connected Etsy Store.
Interval: Interval defines how frequently should the plugin communicate with your Etsy store to get the order data. Setting the Interval setting to 5 minutes means it will use more of your server’s processing resources .
Update Orders: Clicking on Update Orders button will fetch the newly created orders from your Etsy store.
Detailed Inventory Sync Settings
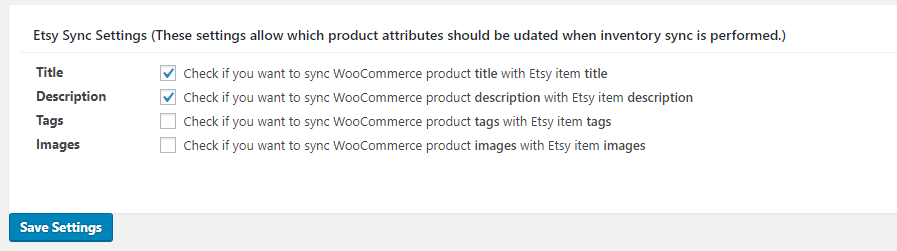
When you update your products on Etsy, if you make the changes on the Etsy Shop Manager to check the product optimization, you will require to keep your changed product data. For this you can use this Detailed Sync Settings. This option will allow you to choose whether to sync or keep your product data unchanged in Etsy marketplace. If you have any confusion regarding these settings, please feel free to contact our support team.
Successfully completed the process?
Looking to start selling on Amazon too?


