
We are sure that you have purchased at least once from Amazon marketplace. Probably you also created your account on Amazon if you are a regular buyer there. You may have also seen the Sell on Amazon and registered yourself as a seller. In this post, we’ll discuss the type of Amazon Seller Accounts, Amazon Marketplaces and selling considerations.
Before jumping into how to create a seller account, we’ll take a brief look at the Amazon Marketplaces that are available.
The available Amazon Marketplaces
- Amazon.com for the USA
- Amazon.com.mx for Mexico
- Amazon.ca for Canada
- Amazon.co.uk for the United Kingdom
- Amazon.fr for France
- Amazon.it for Italy
- Amazon.de for Germany
- Amazon.es for Spain
- Amazon.com.au for Australia (recently launched)
- Amazon.co.jp for Japan
- Amazon.in
These individual marketplaces cater to the special needs of specific countries. Listing products on these specific marketplaces ensure that you target the specific audiences of that country. These Amazon marketplaces mostly offer products based on local language and so, if you are ready to ship your products globally, you could list your products in more than one of these marketplaces.
If you have a Professional Seller account on Amazon.com and you are selling successfully, you can expand your business to sell on the Amazon.ca and Amazon.com.mx. United States, Canada and Mexico marketplaces are classified as the North American marketplaces of Amazon.
Now, let’s look into the type of accounts that you can have on these Amazon Marketplaces.
Types of Accounts on Amazon Marketplaces
On the basic level, you can have one account which will serve to hold your purchase records and other basic information. But, the purpose of this post is to provide information about the Amazon Seller Accounts.
There are two types of seller accounts:
- Individual Seller Account: If you are planning to sell off a few items that you have extra or those that you don’t need.
- Professional Seller Account: Professional seller plan allows you to create numerous product listings on the Amazon marketplace that you have created your account for.
One key difference between these two seller accounts is the amount of charge that you’ll pay to Amazon. Professional seller plan requires you to pay a monthly amount of $39. You can check the differences between Amazon Seller Plans here:
How to create a professional seller account on different Amazon marketplaces?
To make a decent amount of profit by selling on Amazon, you need to list more products and maintain the sales volume. You need to provide correct and updated product information, engage the right shipping and refund policies and most of all; you’ll need to list your product on the right marketplaces. Those products that have a high chance of making a sale on Amazon.ch may not perform well on Amazon.co.uk. So, you’d go to the respective marketplace to create a seller account on Amazon; you’d basically go to the “Sell” link and start from there.
So, let’s look at the process of creating a professional account on Amazon marketplace:
Creating a Professional Seller Account for Amazon.com
Please follow the steps listed below to create your professional seller account on Amazon.com marketplace.
1. Go to the Amazon.com and click on “Sell” link.
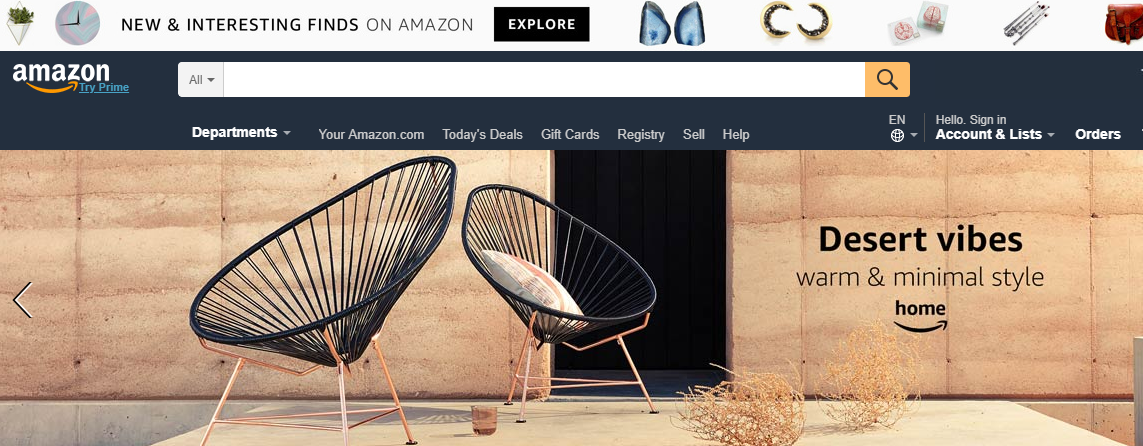
This is the most common Amazon.com page that every seller and buyer visit time and over again. But only those people with the intention to sell realize that there is a “Sell” link in between the Registry and Help links just below the search bar. You should click on that “Sell” link to start creating your Amazon seller account.
2. On the next screen, click on the Start Selling button.
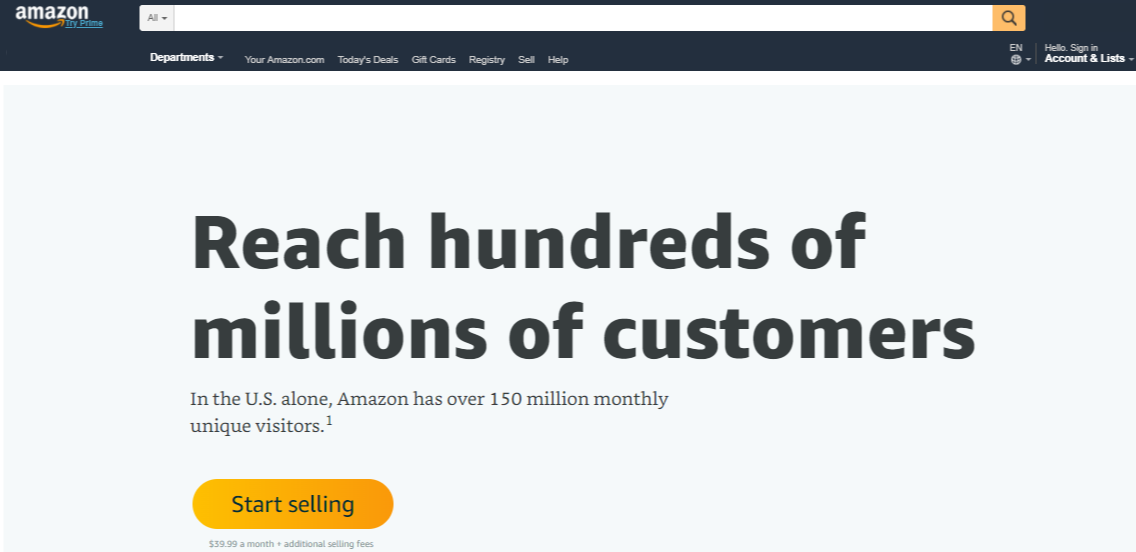
You’ll be brought to this page where Amazon encourages you to start selling. Click on the big yellow “Start selling” button to proceed to the Next step. If you are not logged in, you will be taken to the login or create account page.
3. Log in or Create your Amazon account
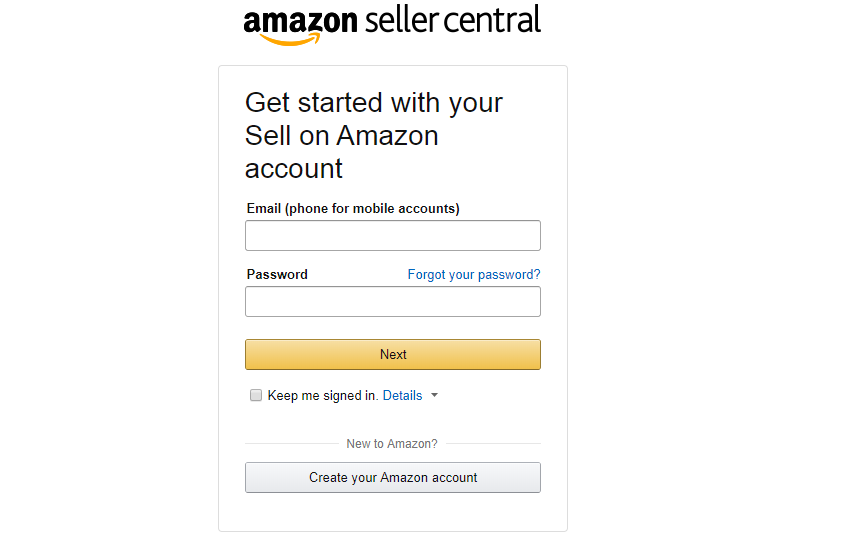
If you have an account with Amazon, provide your login credentials and click on the Next button, or if you don’t have one, you can click on Create your Amazon account button. You can choose to create a new account if you have registered a new business and want an Amazon account to go complement that business. Please note that creating multiple Amazon Seller accounts is not a good practice and also prohibited by Amazon.
4. Gather required information to set-up your Amazon seller account
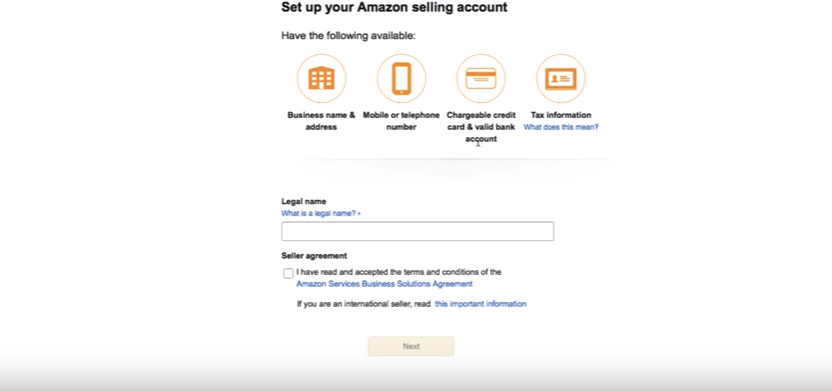
The information that you should collect before starting to set-up your Amazon seller account is basically related to:
- Business Name and Address
- Mobile or Telephone Number
- Chargeable Credit Card and Valid Bank Account
- Tax Information
Here, the Legal Name is the name of your business if you have already registered one. If you haven’t, it is the name of the taxpayer.
5. Fill in the Seller Information section and click Next
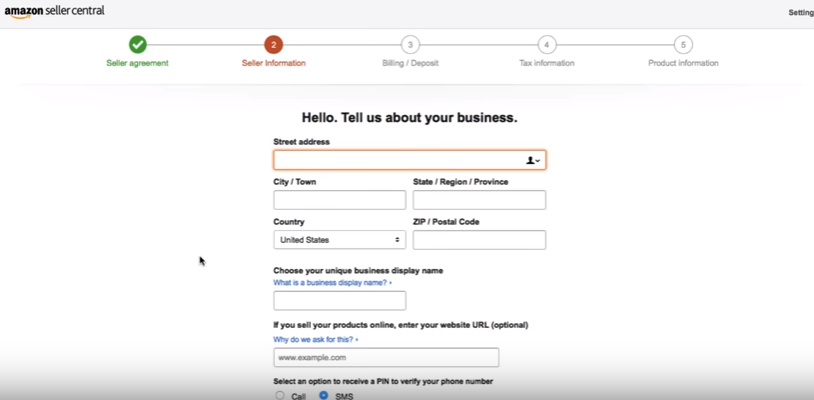
Please fill in the required information related to your business. If you have registered a business then matching that information will help in matters related to tax regulations. Here, as verification, you need to provide your mobile number through call or SMS.
6. Fill in the Billing and Deposit section and click Next

This is where you should choose your selling plan. If you are looking to increase your sales on Amazon and create a sustainable business, you should subscribe to a Professional selling plan. You can use your personal credit card also to set up the deposit method.
7. Fill in the Tax Information section and click Next

Even if you have subscribed to a Professional Seller plan and you haven’t registered a business, you can select the Individual/Sole-Proprietor option for “Who will receive the income from Amazon or its subsidiary?” Follow along with the process and provide your consent for Electronic signature on the IRS W-9 form (for the US).
After that, you’re almost done. Provide some information about the products, enable two-step verification and provide phone numbers used for the verification process. You’ll then be redirected to the Manage Inventory page of your Seller Central from where you can start adding and selling products.
If you are looking to sell your products in multiple marketplaces, you will find the information on this page helpful and you can start from there.
Summarizing your requirements to start selling on Amazon using ExportFeed
- Professional Seller Account on your desired Amazon Marketplace
- Amazon Marketplace Developers Permissions
- Marketplace ID of the desired Marketplace
- Seller ID of the desired Marketplace
You can grab the information related to using ExportFeed to list and sell the bulk volume of products on Amazon marketplaces from here.
After completing your account registration with Amazon as a professional seller… What Next?
Follow the Amazon Seller rules – Always!
If you are not accustomed to selling in the online marketplaces, creating your account on Amazon is just the first step. Many beginners take a wrong turn during their course of action while selling on Amazon for the first time. So, we recommend you to take a look at the rules for Amazon sellers. Entering into the Amazon Marketplace as a seller indicates your acceptance towards the rules of Amazon community. The basic version of Amazon community rules can be summarized as:
- Honor your commitment to buy or sell.
- Maintain current account information.
- If your selling privileges are removed, you may not open a new selling account.
- Do not misrepresent yourself.
Further, there are other specific rules like do not create multiple Amazon accounts unless necessary or with approval, do not use inappropriate business names or phone and email communication and others. You can check brief of Amazon seller rules in here.
Check the product guidelines according to Marketplaces
Different marketplaces will have different product guidelines. Amazon guidelines mostly include the legal aspects but as a professional seller, you also need to analyze the profitability. The product which may yield you a nice profit in a certain marketplace may not perform in the same manner in other marketplaces.
The product guidelines can be based on the environmental aspect of marketing or the versioning of product or any such factor which may be required for that marketplace. Like for example, if you are listing your product in the US marketplace, you will find the product guidelines as such:
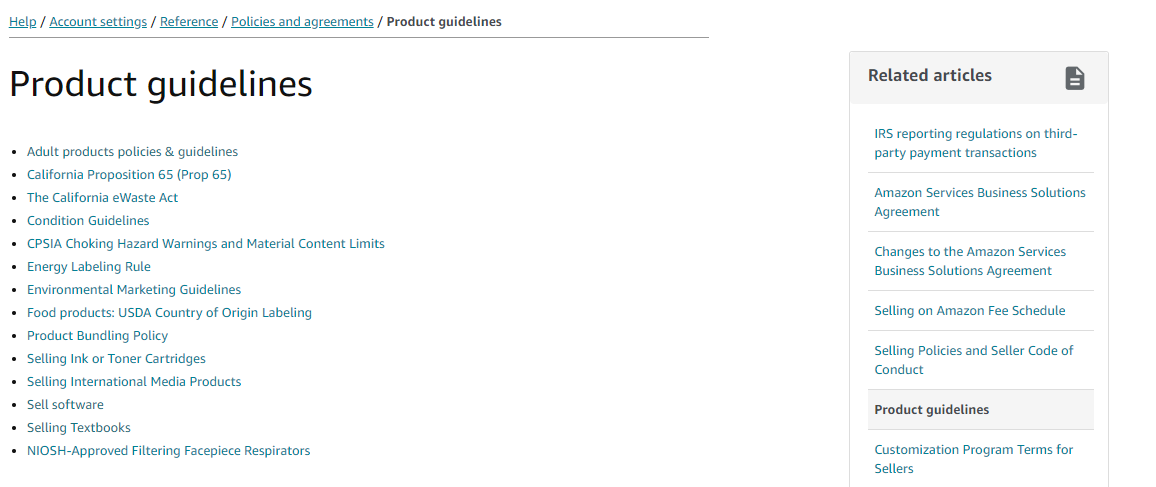
Any successful Amazon seller will go through the product guidelines at least once and follow them exactly everytime they list and sell products in the marketplace.
Product Selection, Pricing, and Distribution Channels
Product Selection
In order to increase your product sales through Amazon marketplaces, you need to make the right choice of product categories for the different marketplace. That if you choose to go with the option to selling on multiple marketplaces. But note that, selling on multiple marketplaces will incur multiple seller central charges.
While selecting the products to sell on Amazon marketplaces, you’ll need to make sure that the product categories aren’t restricted by Amazon. These may be specific to the Amazon marketplace that you opt to create your seller account. You can check for the product and categories restricted by Amazon here. For some specific items, you may request for the permission to sell with the seller central support.
If you are looking to sell products that require approval, then the process to request for it is fairly simple.
- In Seller Central, click the inventory link and select Add a Product.
- Run a search for the item you wish to sell.
- In the search results, click the Listing limitations apply link across from the item.
- Click the Request Approval button to begin the application process.
Pricing
Now, after you have selected the product or product category, you can start working on your pricing. Apart from your normal pricing methods, there are few other points which you should consider. Even more, when you are selling on multiple Amazon marketplaces, you need to be careful about setting your pricing on different Amazon marketplace.
- State and display your product pricing and refund policy clearly.
- Keep thoughts about your product acquisition cost and profit margin
- Note the currency conversion rates if selling through multiple Amazon marketplaces
- It is not a good practice to be the cheapest seller but maintain competitive pricing.
- If you have the option to select the flexible pricing, make sure to use them.
Distribution
After pricing, the next important part that you need to take care of is the shipping. While selling on Amazon, if you are not able to deliver products to the buyer, bad reviews may cause your products to fall far below on the Amazon product search. The best practice is to offer free shipping where you can or offer flat rates if applicable. Make sure to notify where you can and cannot ship the products that you are selling.
You can also use the FBA where Amazon stores, packs and ships your products including handling the customer queries. FBA is especially useful if you are selling on the North American marketplaces and the European marketplaces combined. The requirement of providing customer support is handled by Amazon staffs. However, you’ll need to make precise calculations regarding storage costs and estimations regarding product sales when you are using FBA.
How ExportFeed helps you sell on Amazon effectively?
- ExportFeed app is easily available through the Shopify App store
- We’ve offered unrestricted Free trial of 7 Days with free support
- We’ll create your Amazon product feed free of cost for the 1st time
- You can map categories and customize attributes as you need
- Our support team will help you through each step when you need.


